
Chapter 6 – The letter from no one
Introduction
Hello everyone, welcome to our Walkthrough for Chapter Six of Year Three of Harry Potter Hogwarts Mystery. Last time, with the help of your friend Rowan, you decoded Jacob’s notebook and found out that he had a secret room where he kept his research about the Cursed Vaults.
You went there with one friend of yours and found out that the room is locked with a padlock containing two keyholes. There was writing on it saying it is the property of Tulip Karasu. She is another third-year, and quite a mischievous one, according to your friend.
You went to meet with Tulip, and after some convincing, she revealed that she only has one key for the padlock. The second one is held by Merula Snyde. You will have to find a way to get rid of Barnaby and Ismelda, so you could confront Merula about the key.
Summary
Chapter Summary:
- Lesson 1: Finite Incantatem
- Location: Charms Classroom
- Unlock: 6 Charm stars
- Requirements: 3 hours – 5/5 stars
- Lesson 2: Mandrakes
- Location: Herbology Classroom
- Unlock: 6 Herbology stars
- Requirements: 8 hours – 5/5 stars
- Task 1: Talk to Tulip
- Location: The Great Hall
- Requirements: None
- Task 2: Get a Jumbo Dungbomb
- Waiting Time: 3 hours
- Location: Zonko’s Joke Shop
- Requirements: 3 hours – 1/5 stars
- Task 3: Collect Rare Butterbeer
- Location: Three Broomsticks
- Requirements: 3 hours – 1/5 stars
- Task 4: Meet Rowan
- Location: Your house’s Common Room
- Requirements: None
- Choice: Speculate with Rowan who wrote the letter
- Professor Dumbledore: +5 Empathy
- Merula Snyde: +5 Courage
- I’m not sure: +5 Knowledge
- Task 5: Meet Bilton
- Waiting Time: 3 hours
- Location: Zonko’s Joke Shop
- Requirements: 3 hours – 1/5 stars
- Task 6: Prank Merula
- Waiting Time: 8 hours
- Location: Clocktower Courtyard
- Requirements: 3 hours – 5/5 stars
- Task 7: Defeat Merula
- Location: Clocktower Courtyard
- Requirements (Duel): 15 Courage, 16 Empathy, 17 Knowledge; 225 Coins
- Chapter Rewards: 250 Coins and 900 Experience Points
Walkthrough
Video guides are available at our YouTube channel. Use the button below.
As usual, you can start things off with the lessons part of the chapter. Hit the GO button and proceed to the Charms classroom.
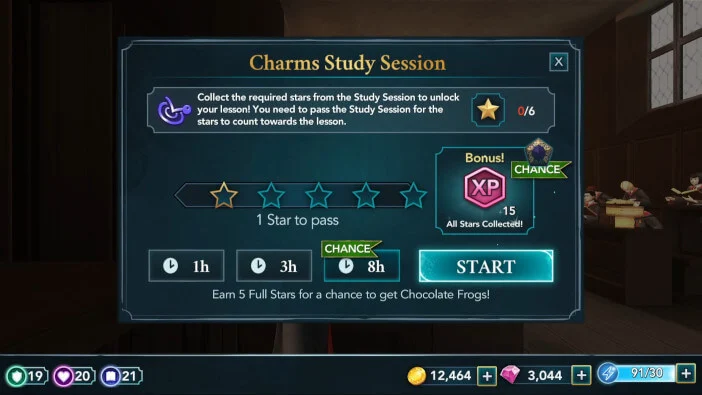
Unlocking Finite Incantatem requires you to earn a total of six stars from Charms classes. There are several different ways to accomplish this. The fastest one involves doing three one-hour classes. However, this is the least rewarding option, so if you have time to spare, you might want to consider doing two eight-hour classes in order to gain more attributes and house points.
As usual, complete various actions by tapping on the glowing objects. This will fill up the star meter and eventually, you’ll earn stars. Always prioritize bonus progress actions since that way you can optimize energy usage.
And after earning each star, you’ll be given a mini-task. Completing it successfully will grant you ten Empathy points.

When you are done, hit the Collect button to claim your rewards and continue. Once you unlock the lesson, head back to the Charms classroom to attend it.
In order to learn Finite Incantatem, you need to earn five stars in three hours. Because all of the stars are required to pass, having full energy prior to starting will make this lesson much easier to complete.

There isn’t much of a difference between this lesson and the other Charms classes, so you shouldn’t have any trouble with it.
Once you acquire the fifth star, you will be tasked with casting the spell. Trace the wand movement on the screen to perform this.

When you are done, you’ll receive rewards for completing the lesson. You can claim an additional reward in the Charms section of your Hogwarts Record.
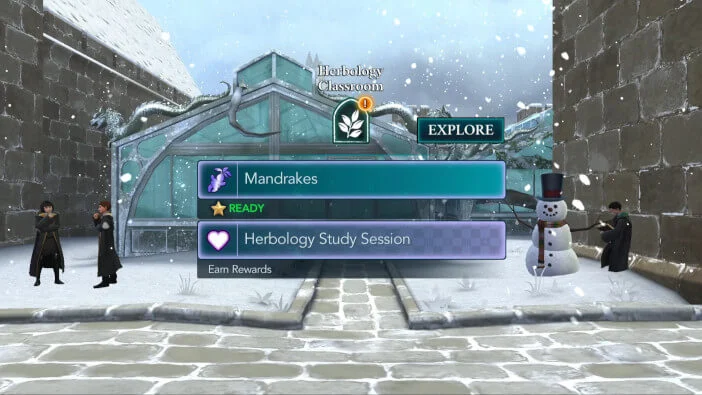
One down, one to go. Proceed to the Herbology Classroom to attend the second lesson of this chapter. To unlock the Mandrake lesson, you need to earn a total of six stars from Herbology classes. Choose a class combination to your liking and hit the Start button to begin.

These classes should be done in the same way as any of the other ones you had so far. Focus on completing actions with bonus progress whenever you get the chance and you’ll be able to save some energy.

Use the opportunity to earn some additional Empathy points by completing mini-tasks successfully. Once you are done with these classes, hit the Collect button to continue.
When you earn enough stars, the Mandrakes lesson should be unlocked. Head back to the Herbology classroom to attend it.
When you get there, you can interact with some of the students by tapping on their speech bubbles. Afterward, tap on the exclamation mark to bring up the task window. Completing this lesson requires you to earn five stars within eight hours.

This lesson behaves in a pretty similar manner to an eight-hour class. The big difference is that in order to pass this one, you need to earn all five stars. Also, some of the mini-tasks are unique to this lesson. During the lesson, Professor Sprout will ask you a question about Mandrakes.

As soon as you obtain all five stars, you will be tasked with repotting your Mandrake. Trace the shape on the screen to successfully perform this.

There will be a funny scene following this lesson during which your character will stuff some Mandrakes in the robes. This is related to one of the following story tasks, so you shouldn’t worry too much about it now.

Now that the lessons are taken care of, you can resume the story. Hit the GO button and proceed to the Great Hall to meet Tulip.
She will tell you the details of her plan. Basically, your job is to go to Zonko’s shop and acquire a Jumbo Dungbomb while she takes care of the other ingredients.

You will need to wait three hours before you are able to continue. Once the waiting time is over, you can proceed to Zonko’s Joke Shop.
You’ll ask Bilton about the Jumbo Dungbomb. He will need to check in the back to see if he has any of them. In the meantime, you’ll receive a task to explore Zonko’s. This task requires you to earn five stars within three hours. Only one star is needed to pass, so this shouldn’t pose much of a problem.

You can slide the screen left and right in order to see all the available actions. Prioritize the bonus progress actions if you want to save some energy.

When you are done, the shopkeeper will return and inform you there is only one Jumbo Dungbomb left in the store. In order to acquire it, you’ll need to obtain some baby Mandrakes and a rare Butterbeer 1707 from the Three Broomsticks. Luckily, you already have the Mandrakes, so there is only one other thing to obtain.
Your next task is to go to the Three Broomsticks and see if you can somehow procure the rare Butterbeer. Once you are in there, you’ll notice the speech bubbles above some of the characters. Tap on those if you are interested to see what they have to say to you.
If you successfully helped Madam Rosmerta with gathering the ingredients for her extra-sweet Butterbeer, she will thank you for it.

You will ask her about the rare Butterbeer and say that you are getting it for Bilton Bilmes. Madam Rosmerta will agree to give you the Butterbeer, but in return, you’ll need to tend to the customers while she fetches it from the back room.
This task requires you to earn five stars within three hours. Only one star is needed to pass, so this is a fairly easy task.

Make sure to slide the screen left and right to see all the available actions. There are plenty of bonus-progress actions to choose from, which will allow you to save some energy. When you complete this task, Madam Rosmerta will return with a barrel of Butterbeer 1707.

Your next task involves going to your Common Room. Apparently, Rowan has found a letter on your bed. Hit the GO button and proceed there when you are ready.
Rowan will hand you the letter, and you will open and read it. The letter will warn you that you are in great danger. Your investigation into the Cursed Vaults has drawn the attention of a dangerous group. Whoever wrote the letter will tell you to be careful and remain courageous. The mysterious writer will promise assistance whenever possible.
The letter was written and signed by a “friend”, but it is unknown who that person actually is. Rowan will ask if you have any clue who could’ve written the letter. You have three response options.
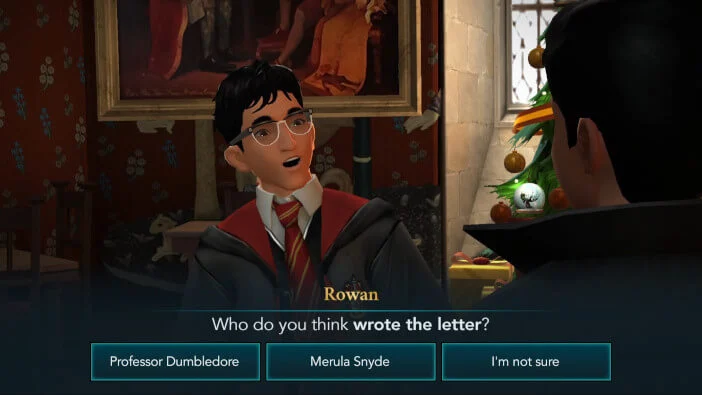
Each choice will award you with five attribute points, but in any case, you won’t be able to say for sure who wrote the letter. Your next task is to bring the items you obtained to Zonko’s. Sadly, you’ll have to wait three hours before you can proceed.
Once you are able to continue, head back to Zonko’s Joke Shop. As soon as you enter, you’ll notice Tulip standing there, waiting for you. You’ll approach Bilton and give him the items he requested.
You’ll then receive a task to explore Zonko’s while the shopkeeper gets you the Jumbo Dungbomb. Exploring Zonko’s requires earning five stars within three hours. One star is needed to pass.
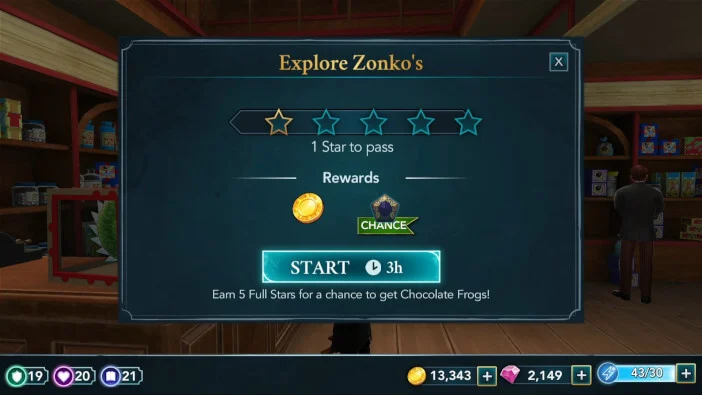
This task is, more or less, almost identical to the previous one. Simply follow the same steps and you won’t have any trouble completing it in time. As soon as you are done, Bilton will return with the Jumbo Dungbomb.
Shortly after, Tulip will go to assemble the Ultimate Dungbomb. You will need to wait eight hours before you can continue. Once the waiting time is over, head to the courtyard to meet Tulip.
Tulip will suggest observing Merula and her cronies until you find the perfect opportunity to strike. Eavesdropping on Merula requires earning five stars within three hours. Since all five stars are required to pass, you might want to consider having full energy before starting.
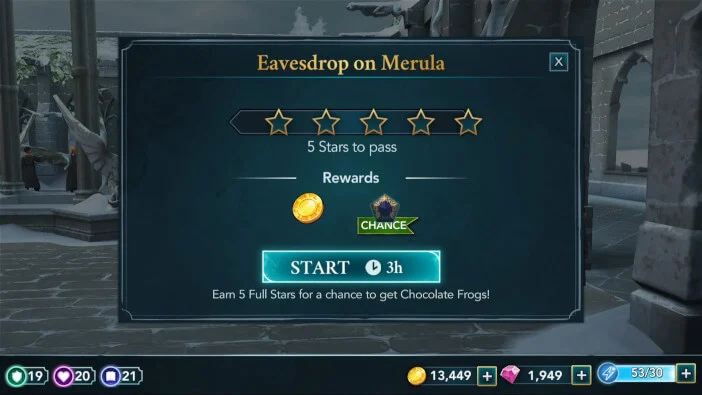
There are actions with bonus progress tied to Barnaby, Ismelda, and Tulip. Focus on those if you want to save some energy.

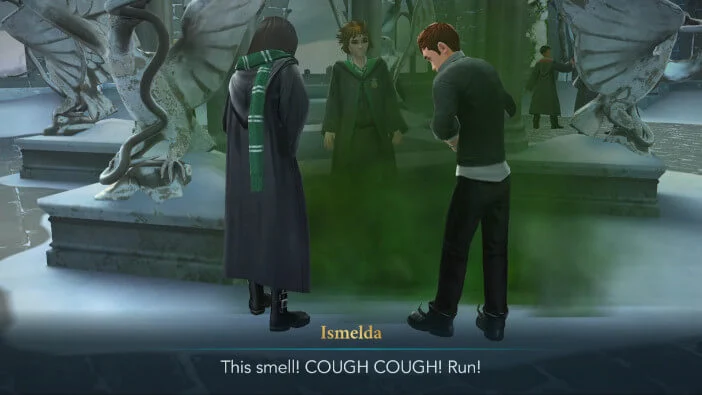
When you are done, you will get the perfect opportunity to prank Merula and her cronies. First, you will need to use the Hardening Charm on the Ultimate Dungbomb.

Next, you’ll need to send it flying directly into them. Trace the path on the screen to cast Depulso.

The plan will work and both Barnaby and Ismelda will run off, leaving Merula alone.
You’ll then approach Merula and start the conversation. You and Tulip will ask Merula for the key. Sadly, Merula will not want to reason with you, she’ll want a dueling rematch.
In the end, you’ll have to duel Merula in order to obtain her key. Tap on the crossed wands icon to continue. In the task window, you will be able to see the recommended attribute levels as well as the cost of each attempt.

There are several ways to approach this duel. If your Courage or Empathy attributes are at least three levels higher than the recommended ones, you can simply go Aggressive (in case of Empathy) or Sneaky (in case of Courage) and use Depulso or Flipendo. That should allow you to win the duel in two turns as long as you don’t get stunned.
If your attributes are close to the recommended ones, you can instead go Aggressive on the first turn and use Incendio. If you get the burn effect, you can go Aggressive or Sneaky during the second turn and use Depulso or Flipendo. With some luck, you should win the duel using this strategy.
The third strategy involves going Aggressive or Sneaky all the time and using Depulso or Flipendo. This strategy kind of depends on luck, but it is also a viable way to win the duel.

Once you defeat Merula, she will hand you her key. Before she leaves, she will warn you not to trust Tulip.
This will be the end of Chapter 6 of Year 3. Hit the Collect button to claim your rewards. You will receive 250 Coins and 900 Experience points.
What will you find inside Jacob’s room? Will you get any more clues that could help you locate the next Cursed Vault? Find out in the next chapter of Harry Potter Hogwarts Mystery!
Thank you for reading. Until next time.
