
Chapter 33 – Double Agents
Introduction
Hello everyone, welcome to our Walkthrough for Chapter Thirty-Three of Year Seven of Harry Potter Hogwarts Mystery. During the previous chapter, you went to see Madam Umbridge before the Wizengamot trial started. She talked to you about the courtroom procedures, and while you were in her office, she offered you a cup of tea.
Unbeknownst to you, the tea was in fact Veritaserum, and you later found out that Jacob drank it while he was in Madam Umbridge’s office. Thankfully, Corey was able to create a distraction and delay the trial long enough for the effects of Veritaserum to wear off.
During that time, you had the chance to bond with Jacob. Later on, both you and your brother testified against the White-Robed Wizard, and thankfully, he was found guilty of all charges.
Summary
Chapter Summary:
- Lesson: Concealment Charms
- Unlock: 9 Defence Against the Dark Arts Stars
- Location: Defence Against the Dark Arts Classroom
- Requirements: 3 hours – 5/5 stars
- Task 1: Enjoy your Victory
- Location: Three Broomsticks
- Requirements: 3 hours – 3/5 stars
- Choice: Choose whether you agree with Corey or Merula
- Agree with Corey: +5 Courage
- Agree with Merula: +5 Knowledge
- You’re both right: +5 Empathy
- Task 2: Meet with Dumbledore
- Location: Dumbledore’s Office
- Requirements: 1 hour – 3/5 stars
- Choice 1: Reply to Professor Dumbledore
- It concerns me as well: +5 Knowledge
- Must be a coincidence: +5 Courage
- Just glad Jacob is safe: +5 Empathy
- Choice 2: Choose to share the secret of the Dark Scroll with Dumbledore or don’t
- The Dark Scroll…: +5 Knowledge
- Say nothing: +5 Courage
- Task 3: Go to the Ministry of Magic
- Waiting Time: 2 hours
- Location: Department of Magical Law Enforcement
- Requirements: 3 hours – 3/5 stars
- Choice 1: Reply to Mad-Eye
- Celebrate loudly: +5 Courage
- Keep your composure: +5 Knowledge
- Cheer silently: +5 Empathy
- Choice 2: Reply to Mad-Eye
- Let’s hear him out: +5 Empathy
- It could be dangerous: +5 Knowledge
- I want to face him (46 Courage): +10 Courage
- Task 4: Meet with Shiratori
- Waiting Time: 3 hours
- Location: Wizengamot Courtroom
- Requirements: 8 hours – 5/5 stars
- Choice 1: Reply to Shiratori
- Why should we believe you?: +5 Knowledge
- Keep talking: +5 Courage
- Why flip now?: +5 Empathy
- Choice 2: React to the whole situation about Shiratori
- This is what he deserves: +5 Courage
- I feel sorry for him: +5 Empathy
- Not sure how I feel: +5 Knowledge
- Ministry Assignment: Wizengamot Wisdom
- Unlock: None
- Interview the Witness:
- Location: Department of Magical Law Enforcement
- Requirements: 30 minutes – 1 star
- Perform Clerical Duties:
- Location: Department of Magical Law Enforcement
- Requirements: 3 hours – 3 stars
- Send Mail:
- Location: Owlery
- Requirements: 1 hour – 2 stars
- Review Wizengamot History:
- Location: History of Magic Classroom
- Requirements: 30 minutes – 1 star
- Ask for Advice:
- Location: Dumbledore’s Office
- Requirements: 1 hour – 2 stars
- Quiz Answers:
- Where did I see the fugitive go? – Hog’s Head Inn
- What was my first job in the Ministry of Magic? – Clerk
- Who is the current Chief Warlock of the Wizengamot? – Professor Dumbledore
- What do those who sit on the Wizengamot have on their robes? – The letter W
- What did Madam Bones say about firsthand experience? – It’s the best education
- Rewards: 5 Gems
- Interview the Witness:
- Unlock: None
- Chapter Rewards: 350 Coins and 2000 Experience Points
Walkthrough
This is definitely a good cause for celebration, but before that, you should take care of lessons and assignments. Proceed to the Defence Against the Dark Arts classroom when you are ready. To unlock the Concealment Charms lesson, you need to earn a total of nine stars from the Defence Against the Dark Arts classes. Select the class duration you prefer and hit Start when you are ready to begin.

While doing these classes, prioritize the bonus progress actions to save as much energy as possible.

Also, try to successfully complete all of the mini-tasks to earn some extra Courage points.

Head back to the classroom once you earn enough stars to unlock the lesson. You have three hours to earn five stars that are required to complete the Concealment Charms lesson.

Like before, prioritize the bonus progress actions whenever they are available.

During the lesson, Bill will ask you a question about concealment charms.

Upon earning the fifth star, you will be tasked with casting Revelio to reveal the concealed object.

Hit the Collect button to claim your rewards and continue. You can claim an additional reward in the Defence Against the Dark Arts section of your Hogwarts Record.

Head to the Ministry Office when you are ready to start the assignment. You’ll ask Madam Bones if there is anything you can help her with.

As it seems, you are one of the few students who managed to impress her. She’ll ask you to work with her and gain some experience. You will need to finish several tasks to complete the assignment. Feel free to do them in any order you prefer.

While doing these tasks, it is recommended to pick the duration that matches their star requirements.

Prioritize the bonus progress actions whenever they are available. This should save you some energy.

Try your best to complete all of the mini-tasks successfully. That way, you will earn some additional attribute points.

Once you finish all of the tasks, hit the Collect button to return to the Ministry Office.

Madam Bones will be impressed with your work.

She’ll admit that not many people can keep up with her rigorous schedule, and she will hope that you learned something from working with her. As it seems, you might have a promising career in the Ministry in the future.

You’ll thank Madam Bones for her kind words. You will earn a reward for completing the assignment.

Now that you are done with lessons and assignments, you can continue the story. Head to the Three Broomsticks to meet with your friends. When you arrive, you’ll notice that pretty much all the members of the Circle of Khanna are there. You’ll be able to interact with some of them and see what they have to say. Corey will be very happy to see you arrive.

Your friends will loudly cheer at you.

Corey will suggest you have a Butterbeer and celebrate with the rest of your friends. After all, you don’t need to worry about the White-Robed Wizard anymore.

Still, the thought of ‘R’ still being out there will constantly wander around your mind. Corey will advise you not to worry so much. With the Dark Scroll hidden away and Merula working as a double agent, you are closer than ever to putting an end to this dark organization. Merula will approach you, and you’ll notice that the fake Scrofungulus didn’t have a lasting effect on her.

She’ll say that while the Circle of Khanna is celebrating, ‘R’ is most likely plotting another one of their schemes. According to Merula, they have agents everywhere.

Corey will disagree with her.

You’ll then get to state your opinion. There are three options to choose from. If you like Corey, it is recommended to pick the first option. If you like Merula, you should choose the second one. If you don’t want to pick a side, you should go with the third option.

In any case, Corey will be confident that the Circle of Khanna is more than capable of dealing with ‘R’. The following few lines will differ based on your previous choice.


Celebrating the Wizengamot verdict requires earning five stars within three hours. Three stars are needed to pass.

There are bonus progress actions tied to Merula, Cedric, and Andre. Prioritize those if you want to save some energy.

The following lines of dialogue will differ, based on your previous choice.

You will look forward to having another party once ‘R’ is defeated for good.

Corey will have a lot of faith in your double agent. Merula will point out that defeating ‘R’ won’t be an easy task.

Moments later, Tonks will approach you and say that the Headmaster wants to see you in his office as soon as possible.

Apparently, he wants to talk about the Wizengamot trial. Tonks will also mention that Professor Dumbledore seemed a bit preoccupied. Corey will be worried that he found out about Merula’s Scrofungulus infection. In any case, you’ll decide to visit the Headmaster immediately.
Proceed to Dumbledore’s office when you are ready to meet with him. The Headmaster will be glad to see you. He will congratulate you and say that testifying in a Wizengamot is not easy, especially for a student.

Thanks to your efforts, Kazuhiro Shiratori has finally got what he deserved. You’ll be glad to know that the Dark Wizard won’t get another chance to harm anyone else. Professor Dumbledore will admit that he is troubled by something. He’ll remind you that he warned you many times not to get involved with ‘R.’.
There are three options to reply with. This choice won’t significantly impact the story, so feel free to pick the option you prefer.

According to Professor Dumbledore, it is highly likely that ‘R’ will continue to go after you, and there isn’t much you can do about it. However, you always have a choice in the matter.


The Headmaster will say that the following days are going to be very important. Understanding ‘R’ and their plans will be crucial in order to defeat them. You’ll then get to discuss the whole situation. Speaking with Dumbledore requires earning five stars within one hour. Three stars are needed to pass.

There are bonus progress actions tied to your character and the Headmaster. Prioritize those if you want to save a bit of energy.

Unfortunately, Professor Dumbledore won’t be certain about ‘R’’s true plans. The only thing he will be sure about is that ‘R’’s thirst for knowledge and power is insatiable.

Professor Dumbledore will ask if there is anything else you would like to tell him. You can choose to tell him that ‘R’ is after the Dark Scroll or say nothing about it. Either way, you won’t reveal that Jacob found one-half of Dai Ryusaki’s Dark Scroll, so it is recommended to pick the first option.

The Headmaster will thank you if you decide to tell him about the Dark Scroll.

Needless to say, ‘R’ should never be allowed to get their hands on such a powerful artifact. Professor Dumbledore will advise you to pay attention to even the smallest and seemingly unimportant things.
Shortly after, he will inform you that Mad-Eye wants to have a word with you. You will need to wait two hours before you can continue. Since you will most likely be low on energy at this point, it is recommended to wait and let your energy recharge in the meantime.

Proceed to the Department of Magical Law Enforcement once the waiting time is over. When you arrive, you will notice the speech bubbles above some of the characters. Tap on those if you are curious to see what they have to say. Mad-Eye will say that both he and Professor Dumbledore are impressed with your work for the Ministry.

You’ll also learn that Merula, Tonks, and you will be assisting Moody on his next assignment. Tonks will be surprised to hear that.

Apparently, the assignment involves tracking down Dark witches and wizards, and your friend will find it hard to hide her excitement.
Mad-Eye will tell all three of you to be professional and not act like excited children. There are three options to react with. If you want to follow his advice, it is recommended to pick the second option and keep your composure.

According to Moody, the assignment will be very dangerous.


He’ll ask you and your friends to listen carefully to his words. To complete this task, you need to earn five stars within three hours. Three stars are needed to pass.
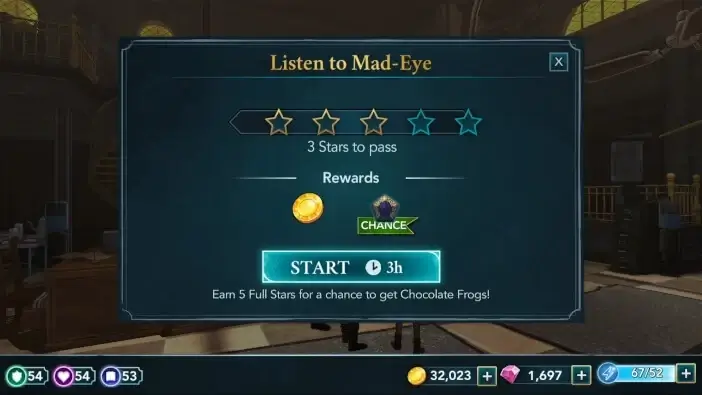
Be sure to slide the screen left and right to see all the available actions. There are bonus progress actions tied to Merula and your character. Prioritize those if you want to save some energy.

Mad-Eye will advise the three of you to always look at the facts before jumping to conclusions.

Once again, Tonks won’t be able to hide her excitement.

Moody will say that he’ll inform you and your friends when it is time to start the assignment. Before you leave, he’ll ask for a moment of your time. As it seems, Shiratori asked to speak with you and Moody before being transported to Azkaban.

You’ll ask Mad-Eye if that’s part of the assignment he mentioned earlier.

Moody will wonder why Shiratori wants to speak with you. There are three options to reply with. This choice won’t significantly impact the story, so feel free to pick whichever option you prefer.

Shortly after, the two of you will leave the office. You will need to wait three hours before you can continue. Since you will probably be low on energy at this point, it is recommended to wait until the timer runs out.

Proceed to the Ministry Office once the waiting time is over. When you arrive, you will notice that Shiratori is tied to a chair. Moody will ask him why he wanted to speak with the two of you.

The White-Robed Wizard will beg not to be sent to Azkaban.

Unfortunately for him, it is a bit too late for that.

Needless to say, he won’t look forward to returning to prison. He will offer to tell you about ‘R’ in exchange for not getting sent back to Azkaban. There are three options to reply with. All of these will eventually lead to the same outcome, so feel free to pick whichever one you prefer.

Shiratori will say that he has no loyalty left for ‘R’ after the Wizengamot trial. Apparently, he is very afraid of the Dementors.

If you’ve completed the Unleash Your Patronus adventure, you will get some additional lines of dialogue.


Mad-Eye will say that the Dementor’s kiss isn’t part of Shiratori’s punishment. Still, the White-Robed Wizard won’t be willing to take his chances. He’ll offer to say everything he knows about ‘R’ in exchange for having his sentence lightened. Following that, Moody and you will decide to hear him out. Listening to Shiratori requires earning five stars within eight hours. All five stars are needed to pass.

Make sure to slide the screen left and right to see all the available actions. There are bonus progress actions tied to Shiratori and your character. Prioritize those if you want to save some energy.

Shiratori will offer to help find the members of ‘R’, he’ll say that one of them is working undercover at St. Mungo’s. You’ll wonder if he is talking about Healer Burke.

Mad-Eye will interrupt you before you say anything. He’ll want to check if the White-Robed Wizard is giving accurate information. You’ll ask Shiratori to tell you the name of the member of ‘R’ working at St. Mungo’s.

Moody will ask him to reveal the location of Burke and the other members of ‘R’, but Shiratori won’t be willing to talk before his sentence gets lightened.

He’ll try to convince Moody he wants to help.


Mad-Eye will say that he’ll talk to his superiors about it.

Shortly after, the guards will take Shiratori to Azkaban.


You will have three options to react to the whole situation. This choice won’t significantly impact the story, so feel free to pick the option you prefer.

Moody will tell you to keep the Dark Scroll safe since there’s no telling what ‘R’ might do to get their hands on it. You’ll promise to do all in your power to keep it safe, and Mad-Eye will be glad to hear that. You’ll decide then to go back to Hogwarts and check on the scroll.

This will mark the end of Chapter 33 of Year 7. Hit the Collect button to claim your rewards. You will receive 350 Coins and 2000 Experience Points.
Is the Dark Scroll really safe? And where did Corey hide it? Find out in the next chapter of Harry Potter Hogwarts Mystery!
Thank you for reading.
