
Chapter 54 – Best-Laid Plans
Introduction
Hello everyone, welcome to our Walkthrough for Chapter Fifty-Four of Year Seven of Harry Potter Hogwarts Mystery. In the previous chapter, Merula informed you that her aunt Verucca wants to meet you in Knockturn Alley.
Verucca explained that your father is a danger to the ‘R’ and he must be stopped. She proposed that you and her work together and steal Dai Ryusaki’s amulet. You explained everything that happened to Jacob, and he said that you shouldn’t believe Verucca. You agreed to consult with Mad-Eye Moody in the Ministry.
Jacob had an idea that you could lure ‘R’ and your father into an ambush while you and Verucca steal the amulet. After that, the Aurors and Hit Wizards would take down Verucca. Mad-Eye explained that this could be an ideal opening for the Aurors. You met Merula again, and you pretended that you and Jacob accepted Verucca’s offer. The execution of Mad-Eye’s plan is getting near.
Summary
Chapter Summary:
- Task 1: Visit <Student>
- Location: Hospital Wing
- Requirements: 3 hours – 3/5 stars
- Choice: Reply to your friend
- Everything will be fine: +5 Empathy
- I’m worried, too (56 Empathy): +10 Courage
- Task 2: Meet with Verucca
- Waiting Time: 4 hours
- Location: Hog’s Head Inn
- Requirements: 1 hour – 5/5 stars
- Choice 1: Choose whether you agree with Jacob or calmly consider Verucca’s offer
- Agree with Jacob: +5 Empathy
- Consider Verucca’s plan: +5 Courage
- Choice 2: Choose a signal phrase
- ‘That’s a shame’: +5 Empathy
- ‘I think someone is listening in’: +5 Knowledge
- ‘Your plan was a failure’: +5 Courage
- Task 3: Steal the Amulet
- Unlock: Complete Assignments
- Location: Knockturn Alley
- Requirements: 8 hours – 5/5 stars
- Choice 1: Choose who you will try to save from Verucca’s attack
- Jump in front of Dad (56 Empathy): +10 Empathy
- Jump in front of Jacob (56 Courage): +10 Courage
- Stay where you are.: +5 Knowledge
- Choice 2: Reply to Jacob
- With logic: +5 Knowledge
- With emotion: +5 Empathy
- With all the help we can get: +5 Courage
- Task 4: Go to St Mungo’s
- Location: St Mungo’s Reception
- Requirements: 3 hours – 3/5 stars
- Choice: Reply to Mad-Eye
- I regret taking the deal: +5 Empathy
- I don’t regret taking the deal: +5 Courage
- Task 5: Visit Jacob
- Waiting Time: 3 hours
- Location: Patient Room
- Requirements: 3 hours – 5/5 stars
- Choice: Reply to Jacob
- It’s my fault you’re here: +5 Empathy
- You’re welcome: +5 Knowledge
- Ministry Assignment: Ready For Anything
- Unlock: None
- Hit Wizards:
- Location: Department of Magical Law Enforcement
- Requirements: 3 hours – 3 stars
- Review Defence Techniques:
- Location: Defence Against the Dark Arts Classroom
- Requirements: 3 hours – 3 stars
- Gather Intel:
- Location: Knockturn Alley
- Requirements: 3 hours – 3 stars
- Listen to Mad-Eye:
- Location: Department of Magical Law Enforcement
- Requirements: 1 hour – 2 stars
- Win a Dueling Match
- Location: Dueling Room
- Quiz Answers:
- What is the minimum age of a Hit Wizard? – 17
- What spell puts its target into an enchanted sleep? – Bewitched
- What must occur before formal action can be taken in a duel? – A three-count
- What were the Dark wizards talking about? – Mind control device
- What item do you need to remove from your dad? – Amulet
- Rewards: 5 Gems
- Hit Wizards:
- Unlock: None
- Ministry Assignment: Unpredictable Artefacts
- Unlock: None
- Practice Defence Spells:
- Location: Defence Against the Dark Arts Classroom
- Requirements: 1 hour – 2 stars
- Research the Topic:
- Location: Library
- Requirements: 3 hours – 3 stars
- Handle Artefacts:
- Location: Department of Magical Law Enforcement
- Requirements: 3 hours – 3 stars
- Review Muggle Items:
- Location: Muggle Studies Classroom
- Requirements: 3 hours – 3 stars
- Drink Butterbeer:
- Location: Three Broomsticks
- Quiz Answers:
- Which curse inflicts excruciating pain on its target? – Cruciatus
- If you disarm an opponent, what should you watch out for? – Wandless magic
- What cursed item was once sent to Bill? – Hat
- What bewitched item does Arthur Weasley own? – Car
- Rewards: 2 Red Notebooks
- Practice Defence Spells:
- Unlock: None
- Chapter Rewards: 350 Coins and 2000 Experience Points
Walkthrough
Before continuing the story, you can first finish your assignments. When you are ready, go to the Clocktower Courtyard. Jacob will say that you need to be as prepared as possible to confront Peregrine, so he’ll prepare for you a series of grueling challenges.

He’ll tell you that you are going to participate in the Auror practice drills at the Ministry of Magic. You will have to do several tasks to complete the assignment. Feel free to do them in any order you like.

It is recommended to select the task duration that matches its star requirements.

Prioritize actions with bonus progress, so you can save a bit of energy.

Try to succeed in mini-tasks to earn extra attribute points.

When you complete all of the tasks, hit the Collect button and go back to Jacob at the Clocktower Courtyard.

You’ll inform Jacob that you trained with Hit Wizards, learned from Mad-Eye, and won a duel. You will feel much more prepared after all this practice.

After you completed all the tasks of this set of assignments, you can claim the reward in the Hogwarts section of the Achievements.

In this chapter, you have another assignment. Go to the Clocktower Courtyard to meet Bill Weasley. Mad-Eye informed Bill that you may be handling some cursed objects. Bill agreed to teach you more about the cursed artifacts so that you can be more prepared.

You will have another set of tasks to complete. Feel free to do them in any order you like.

As always, it is recommended to select the task duration that matches its star requirements.

Prioritize actions with bonus progress, so you can save a bit of energy.

Mini-tasks can give you some extra attribute points if you complete them successfully.

When you complete all of the tasks, hit the Collect button and report back to Bill at the Clocktower Courtyard.

Bill will point out once more that cursed artifacts are very dangerous.

After you completed all the tasks of the assignment, you can claim the reward for this assignment as well, in the Hogwarts section of the Achievements.

Once you complete all the assignments, you can continue with the main story. When you are ready, go to the Hospital Wing to check on your friend. When you arrive, you can check what others have to say by tapping on the speech bubbles above their heads.
During this task, a few lines may differ based on the person who went with you to Peregrine’s experiment. Apart from that, the story is similar.
You’ll see that your friend is awake. You will be sorry for what happened, but your friend will say that it’s not your fault, but your dad’s. Your friend will further explain why it w

Luckily, Madam Pomfrey said earlier that your friend is going to be okay. Your next task is to tell your friend about everything that has happened so far. To do that, you need to earn five stars within three hours. Three stars are required to complete this task.

There is one bonus progress action tied to your character. Prioritize this action to save some energy. Don’t forget to slide the screen left and right to check all the available actions.

Your friend will be glad that Jacob saved everyone and that Dumbledore knows the situation, but the fact that you accepted Verucca’s offer will be a surprise.

You will explain why you and Jacob accepted the offer. The following line may differ based on your choice in the previous chapter when you met with Jacob.

Your friend will still be concerned about you working with her, after everything that’s happened. This choice won’t have a significant impact on the story, but the first option can be more soothing to your friend.

Shortly after, you will start explaining Jacob’s plan involving Mad-Eye and the Ministry. Unfortunately, Madam Pomfrey will inform you that you have to leave so your friend can rest.

You’ll say goodbye to your friend and leave. You need to wait four hours before you meet with Verucca.

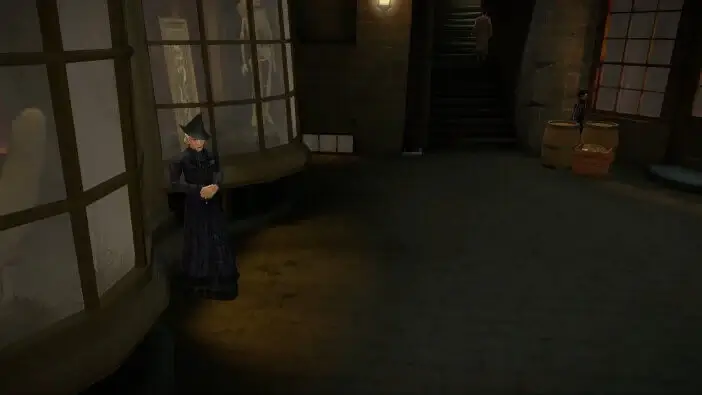
Once the waiting time is over, go to the Hog’s Head Inn. When you get there, slide the screen to see all the speech bubbles and what the inn’s visitors have to say. You’ll notice that Verucca is disguised.

She will explain her plan. You and Jacob will be bait for Peregrine, but the next part of the plan will shock you. She will use the Imperius Curse on your dad.

Jacob will be repulsed by this, and he’ll protest. You can agree with Jacob or calmly consider Verucca’s offer. This choice won’t have a significant impact on the story, but if you like Jacob, it is recommended to pick the first option.

Verucca will ask if you have any suggestions, and you’ll decide to explore other options. To complete the next task, you need to earn five stars within one hour. All five stars are required to pass.

Bonus progress actions are tied to Mundungus Fletcher and your character. Prioritize these actions to save some energy.

You will explain the first part of your plan. Verucca will soon have a meeting with your father, and she should meet him as usual. After some time, Verucca should give a signal for Jacob to apparate and distract Peregrine.

Jacob will ask you what the signal phrase would be. The phrase that Verucca will use will depend on this choice.

Verucca will ask you how you factor into this plan. You will explain that you will use your Invisibility Cloak to hide. While Jacob is causing a scene, you’ll sneak up and snatch the amulet.

Verucca will think that this is a weak plan, but she won’t have a lot of time to argue with you since the meeting with Peregrine is getting closer.

Because of that, she will agree to the new plan, but she will point out that if something goes wrong, she will take matters into her own hands.

She’ll mention that she will contact you when the time is right, and afterward, she will leave the inn. Jacob will tell you that he will send an owl when Verucca tells you when and where the plan is going to happen.
Verucca will inform you that the meeting will happen at Knockturn Alley, so go there when you are ready to continue. You will notice that you and Jacob arrived before Verucca. You’ll decide to remind each other of the steps of the plan. The following line may differ, based on your choice of signal phrase.

You will continue going through the details of the plan. Jacob will mention that he sent word to Mad-Eye.


Shortly after, Verucca will appear, and you and Jacob will go to your starting positions to hide.
Peregrine will apparate near Verucca. He will accuse her, saying that it’s all her fault that the experiment was a failure because she didn’t brew a potent enough potion.

He and Verucca will start arguing, but suddenly Jacob will appear.

Harsh words and accusations will fly between Jacob and his father. You will see it as an opportunity to try to steal the amulet while under the Invisibility Cloak.

To complete the next task, you need to earn five stars within eight hours. All five stars are required to pass.

Bonus progress actions are tied to Jacob and your character. Prioritize these actions to save a bit of energy.

Unfortunately, Peregrine will sense that someone is behind him, and he will turn around and cast Depulso, knocking you back.

After witnessing the failure of your plan, Verucca will take matters into her own hands as promised.


You can try to save someone from her attack. Sadly, your choice won’t matter. Whatever you choose, Jacob will take the hit.


In this very short moment, you will see that your dad loves Jacob, and he will be worried about him.

Sadly, Peregrine won’t be able to help his son because Mad-Eye and Aurors will arrive. He and Verucca will be forced to apparate away to escape.

You will examine your brother, and you will figure out that he is alive. You will urge Mad-Eye to take him to St. Mungo’s hospital.

Go to the Reception in St. Mungo’s when you are ready. You can check what characters have to say by tapping the speech bubbles above their heads. At the hospital, you will wait impatiently for any news about Jacob. Finally, Miriam Strout will arrive with some news.

To complete the next task, you need to earn five stars within three hours. Three stars are required to pass.

Bonus progress actions are tied to Mad-Eye and Miriam Strout. Prioritize these actions to save some energy.

Luckily, you will receive the good news. Your brother is fine for now.

You can even visit him once Madam Strout finishes checking on him. Mad-Eye will regret that he took advantage of your deal and didn’t protect you. You can reply in two ways. This choice won’t have an impact on the overall story, but you will get a different dialogue.

Shortly after, Mad-Eye will tell you that the Aurors are scouring London for your father and Verucca. He will advise you to forget about your Dad and focus on your brother.
Before visiting Jacob, you need to wait three hours so that Madam Strout can do the tests.

Once the Waiting Time is over, go to the Patient Room. Shortly after, you will visit your unconscious brother.

To complete the next task, you need to earn five stars within three hours. All five stars are required to complete this task.

There are bonus progress actions tied to your character. Prioritize these actions to save some energy.

You will talk with him for a while, and once you decide to leave, surprisingly, he will awake.

He’ll be confused, and you’ll explain where he is and what happened. You will then ask him how he feels.

You will apologize to him for his state. He will reassure you that there is no need for you to apologize because you saved him. This choice won’t have a significant impact on the story, so feel free to choose the option you like.

Once Jacob opens his eyes, he will get a grim realization. He won’t be able to see you or anything.

This shocking scene will conclude this chapter. Hit the collect button to claim your rewards. You will receive 350 Coins and 2000 Experience Points.
What happened to Jacob? What kind of spell did Verucca cast on him? Could he be cured? Find out in the next chapter of Harry Potter Hogwarts Mystery.
