
Chapter 9 – Glittery secrets
Introduction
Hello everyone, welcome to our Walkthrough for Chapter Nine of Year Four of Harry Potter Hogwarts Mystery. Last time, you asked Professor Kettleburn to help you learn how to care for Nifflers. You also grew various herbs that Sickleworth could potentially eat.
Also, thanks to Hagrid’s help, you managed to learn a lot more about Nifflers in general. Afterward, you met Madam Rakepick and she let you borrow Sickleworth so that you could find the missing arrowhead.
Summary
Chapter Summary:
- Lesson 1: Pepperup Potion
- Location: Potions Classroom
- Unlock: 9 Potions stars
- Requirements: 3 hours – 5/5 stars
- Lesson 2: Sloth Grip Roll
- Location: Training Grounds
- Unlock: 9 Flying stars
- Requirements: 3 hours – 5/5 stars
- Task 1: Search for the Arrowhead
- Waiting Time: 8 hours
- Location: Artefact Room
- Requirements: 1 hour – 1/5 stars
- Task 2: Talk to Rakepick
- Location: Clocktower Courtyard
- Requirements: None
- Choice: Decide if you want Madam Rakepick to distract Mr. Filch
- Yes! (19 Courage): +10 Courage
- No: +5 Empathy
- Task 3: Search for the Arrowhead
- Waiting Time: 3 hours
- Location: Filch’s Office
- Requirements: 3 hours – 1/5 stars
- Chapter Rewards: 250 Coins and 1600 Experience Points
Walkthrough
Video guides are available at our YouTube channel. Use the button below.
Once you start the chapter, you will be met with a waiting period of eight hours. As usual, you can begin by doing the lessons part of the chapter first. Hit the GO button and proceed to the Potions classroom.

To unlock Pepperup Potion lesson, you need to obtain a total of nine stars from the Potions classes. You can achieve this in several different ways. Simply choose the class combination that is most suitable for your playstyle and hit the Start button to begin.
Do these classes in a usual way – tap on the glowing objects to complete actions. Depending on the energy cost, those will fill up a certain amount of the star meter. In general, focus on bonus progress actions whenever you can to save as much energy as possible. After completing enough actions, you’ll earn a star.
Also, after obtaining each star, you’ll get a mini-task. Completing it successfully will award you ten Knowledge points.

When you are done, hit the Collect button to continue. Once you earn enough stars to unlock the lesson, you can head back to the Potions classroom and attend it.
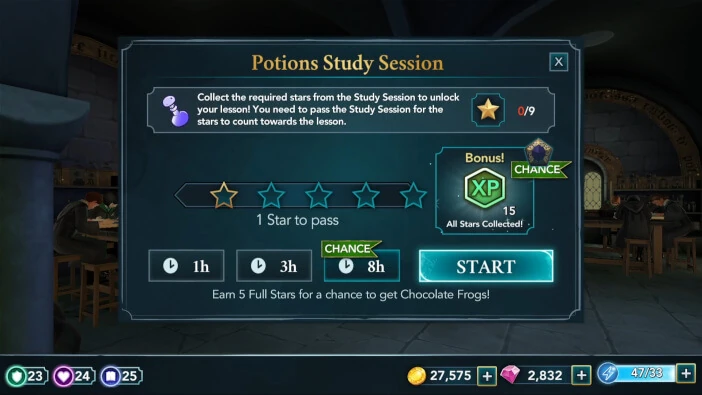
In order to learn how to brew Pepperup Potion, you have to earn five stars within three hours. Since all of the stars are required to pass, you should consider having full energy before starting this lesson.

Do this in a similar way to the classes you took earlier and you’ll be done before you know it. Upon earning the fifth star, you will need to wave your wand over the cauldron to finish your potion. Trace the path on the screen to do that.

Once you are done, hit the Collect button to claim your rewards. You can also collect an additional reward in the Potions section of your Hogwarts record.
Proceed to the Training Grounds for the second lesson of the chapter. Unlocking the Sloth Grip Roll lesson involves earning nine stars from the Flying classes. Like before, simply select the combination of classes that suits you best and hit the Start button to begin.

As always, prioritize completing actions with bonus progress since they will fill more of the star meter per energy point spent than the other actions.
Also, pay attention to the mini-tasks. Completing each of those successfully will grant you ten Courage points, so it’s a nice way of earning some additional rewards.

When you are done, tap on the Collect button to claim your rewards. As soon as you have all nine stars, you can head back to the Training Grounds to attend the Sloth Grip Roll lesson.
Completing this lesson requires earning five stars within three hours. Having full energy prior to starting the lesson will make things much easier.

Approach this in the same manner as any of the regular classes and you shouldn’t have any problems. When you earn all five stars, you’ll need to attempt the Sloth Grip Roll. Trace the path on the screen to perform this maneuver successfully.
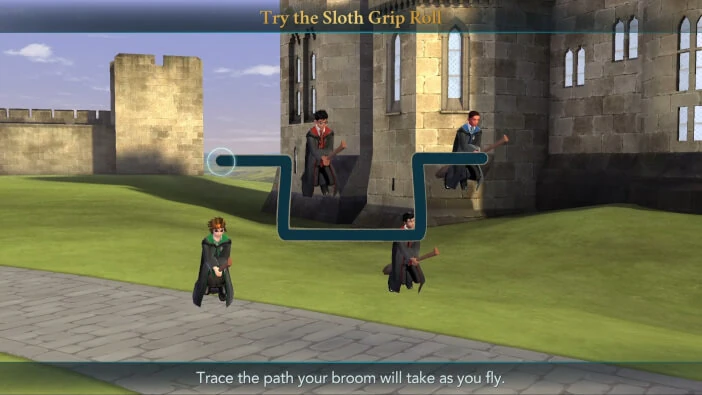
Congratulations! You’ve just increased your maximum energy by one. This will surely be of great use in your future adventures.
Now that the lessons have been dealt with, you can resume the story. Hit the GO button and proceed to the Artefact Room.
You will start talking to Sickleworth about where the arrowhead could be. Ben thinks it’s buried far from the castle, while Madam Rakepick thinks it’s somewhere inside. You will believe it is more likely that Madam Rakepick is right, because she is, after all, a treasure-hunting Curse-Breaker.
The Artefact Room will be the most suspicious place. The arrowhead might be buried somewhere under the junk. You will start searching for it together with Sickleworth. Searching the Artefact Room requires earning five stars within an hour. One star is needed to pass.
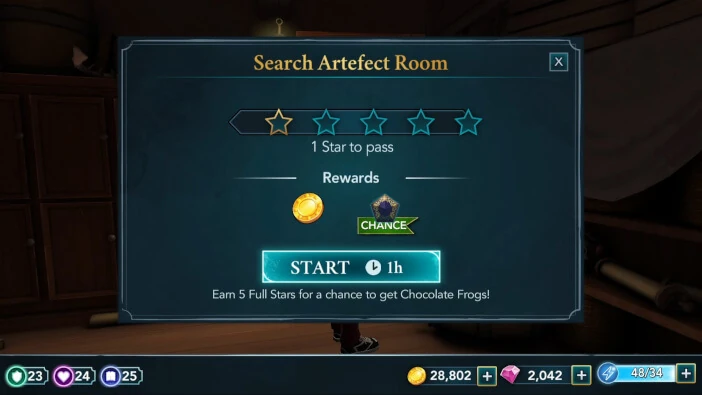
There is a bonus progress action tied to the blackboard. Prioritize it if you want to save a bit of energy.

When you are done, you’ll witness the funny scene in which Sickleworth searches through the room and finds a shiny necklace. Sadly, that’s not the item you were looking for. Also, he’s left quite some damage, so you’ll have to cast Reparo to fix some of it.

The next task is to talk to Madam Rakepick. Proceed to the Clocktower Courtyard when you are ready to meet her. Once you arrive, you’ll notice the speech bubbles above some of the students. Tap on them if you are curious to see what they have to say.
You’ll explain the situation to Madam Rakepick and the next logical place to search would be the caretaker’s office. However, since you’ve already tricked him twice, it’s highly unlikely he’ll fall for another one of your pranks. Thankfully, Madam Rakepick will offer to distract Filch for you. You have two options to respond with.

It is highly recommended to pick the first option as long as you meet the attribute requirement. Afterward, you’ll have to wait three hours before you can continue.
Head to the caretaker’s office once the waiting time is over. You will wonder why Mr. Filch didn’t improve the security of a lock against Alohomora. Sickleworth will suggest with his clicking sounds that maybe Mr. Filch isn’t very smart. Sickleworth will also suggest that you start searching first because he likes bossing people about. Searching the office is a three-hour task that requires you to earn at least one out of five stars.
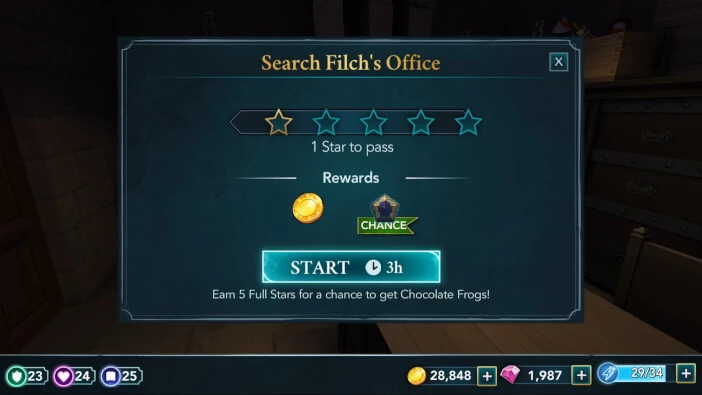
There is an action with bonus progress tied to your character. Prioritize it to save energy.
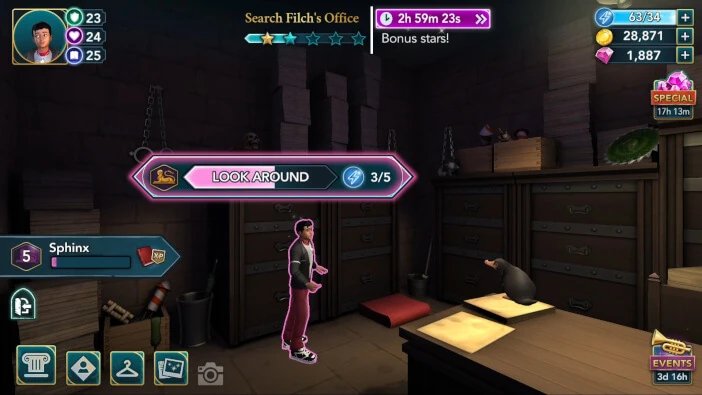
When you are done, you’ll witness a hilariously funny scene involving Sickleworth rummaging through Filch’s office. It really is a sight to behold.

After searching for a while, the Niffler will find a key.

Moments later, Madam Rakepick will show up and by the looks of it, that key was exactly what she was looking for. Apparently, that was her goal from the start. She used you to achieve it, but at least she will allow you to keep her Niffler until you find the arrowhead. Lastly, you’ll have to cast the Mending Charm to fix the damage Sickleworth caused.

With this, Chapter 9 of Year 4 will end. Hit the Collect button to claim your rewards. You will receive 250 Coins and 1600 Experience points.
Unfortunately, you were unable to find the arrowhead. But where could it be? And where will you look for it next? Find out in the next chapter of Harry Potter Hogwarts Mystery!
Thank you for reading.
