
Chapter 36 – Impenetrable and Unplottable
Introduction
Hello everyone, welcome to our Walkthrough for Chapter Thirty-Six of Year Seven of Harry Potter Hogwarts Mystery. Last time, you went to see Mad-Eye about the Auror assignment. You learned that someone attempted to break into Gringotts, and you were tasked with going there to take witness statements and examine the scene. After talking to Griphook, you learned that a Dark Wizard attempted to break into the vault of Sir Elric Parpidum.
Unfortunately, you weren’t able to find out more, so you went to the library to research Sir Parpidum. After going through some books, you found that he was a famous dragon slayer who would collect dragon claws.
You immediately realized that ‘R’ is likely after the first ingredient on Dai Ryusaki’s Dark Scroll, so you decided to inform Moody about it. After talking to him, he said that the Ministry had agreed to strike a deal with Shiratori. However, he requested to talk to you personally, which means that you’ll have to go to Azkaban to see him. You did your best to prepare, and soon enough, you will visit this terrifying prison.
Summary
Chapter Summary:
- Lesson: Phyllomancy
- Unlock: 9 Divinations Stars
- Location: Divinations Classroom
- Requirements: 8 hours – 5/5 stars
- Task 1: Go to Azkaban
- Location: Security Entrance Corridor
- Requirements: 3 hours – 3/5 stars
- Choice: Tell Mad-Eye what you think of Azkaban
- It’s terrifying: +5 Empathy
- It’s magnificent: +5 Knowledge
- It’s nothing special: +5 Courage
- Task 2: Review the Plan
- Location: Azkaban Cell Block
- Requirements: 3 hours – 5/5 stars
- Choice 1: Reply to Mad-Eye
- I’m not scared: +5 Courage
- How can I not be scared: +5 Empathy
- Choice 2: Choose which question to ask Mad-Eye
- Who interrogates Shiratori?
- What about the Dark Scroll?
- No more questions: +5 Knowledge
- Task 3: Question Shiratori
- Waiting Time: 4 hours
- Location: Interrogation Room
- Requirements: 8 hours – 5/5 stars
- Choice 1: Choose how you will react to Shiratori’s provocations
- Lash out: +5 Courage
- Keep cool: +5 Knowledge
- Choice 2: Tell Mad-Eye how you feel
- I feel fine: +5 Courage
- I feel strange: +5 Knowledge
- I feel used: +5 Empathy
- Task 4: Stop Burke
- Location: Romanian Dragon Sanctuary
- Requirements: 51 Courage, 48 Empathy, and 49 Knowledge; 450 Coins
- Choice: Choose to stand by your decision or apologize for interfering
- Stand by your decision: +5 Courage
- Apologise for interfering: +5 Knowledge
- Task 5: Report to Gringotts
- Waiting Time: 3 hours
- Location: Gringotts
- Requirements: 8 hours – 5/5 stars
- Choice: Reply to Merula
- Offer a hug (47 Empathy): +10 Empathy
- Change the subject: +5 Courage
- Offer words of comfort: +5 Knowledge
- Ministry Assignment: Stolen Goblin Treasure
- Unlock: None
- Interview the Witness:
- Location: Department of Magical Law Enforcement
- Requirements: 3 hours – 3 stars
- Consult a Historian:
- Location: History of Magic Classroom
- Requirements: 30 minutes – 1 star
- Research Goblin Markings:
- Location: Library
- Requirements: 1 hour – 2 stars
- Review the Evidence:
- Location: Department of Magical Law Enforcement
- Requirements: 3 hours – 3 stars
- Train with the Best:
- Location: Department of Magical Law Enforcement
- Requirements: 1 hour – 2 stars
- Quiz Answers:
- Where did I find the goblin treasure? – The street
- When was Gringotts founded? – 1474
- Which word best describes Gringotts? – Safe
- If you wanted to stop the thief, which would you use? – Petrificus Totalus
- Rewards: 5 Gems
- Interview the Witness:
- Unlock: None
- Chapter Rewards: 350 Coins and 2000 Experience Points
Walkthrough
But before that, you should take care of lessons and assignments. Proceed to the Divination classroom when you are ready. To unlock the Phyllomancy lesson, you’ll need to earn a total of nine stars from Divination classes. Choose the class duration suitable to your liking and hit Start to begin.

During these classes, prioritize bonus progress actions to save as much energy as possible.

Try your best to successfully complete the mini-tasks. This will earn you some additional Empathy points.

Once you earn enough stars, the lesson will be unlocked, so head back to the classroom to attend it. To complete the Phyllomancy lesson, you’ll need to earn five stars within eight hours. All five stars are needed to pass.

This lesson is fairly similar to the classes you took beforehand. The major differences are the star requirements and some of the mini-tasks.


When you are done, hit the Collect button to claim your rewards. You can claim an additional reward in the Divination section of your Hogwarts Record.

Proceed to the Ministry Office when you are ready to start the assignment. Mad-Eye will be glad to see you.

As it seems, the Ministry has recently recovered some goblin treasure. Moody will say that the treasure needs to be returned to its rightful owner. Unfortunately, he won’t know who that is. Needless to say, goblins aren’t exactly known for being patient, especially when it comes to treasure. You’ll gladly agree to help Mad-Eye find the owner of the treasure.
You will need to complete several tasks to finish the assignment. You can feel free to do them in any order you prefer.

While doing these tasks, it is recommended to choose the duration that matches their star requirements.

Prioritize the bonus progress actions whenever you can to save energy.

Focus on successfully completing all of the mini-tasks to earn some extra attribute points.

Once you finish all of the tasks, hit the Collect button to return to the Ministry Office. Mad-Eye will congratulate you on a job well done.

Thanks to your help, the Ministry was able to return the treasure to its rightful owner. You’ll be glad to hear that and humbly say you were happy to help. According to Moody, you have what it takes to be a great Auror. He’ll admit that your help was essential in solving the case. You’ll thank him for his kind words.
You’ll receive a reward for completing the assignment.

Now that you’re done with the lesson and the assignment, you can continue the story. Head to Azkaban to meet with Mad-Eye Moody. This will unlock Azkaban as a new location for you. There is an energy tappie located in one of the cells. When you arrive, Mad-Eye will say a few words about the place.

Suffice it to say that getting to Azkaban is far from easy.

You’ll have three options to react to the place. This choice won’t significantly impact the story, so feel free to pick the option you prefer.

Mad-Eye will tell you to stay close to him, emphasizing that the Ministry and Professor Dumbledore reluctantly agreed to let you visit Azkaban. Unfortunately, it was the only option to get Shiratori to talk. In any case, the sooner you talk to him, the sooner you will leave Azkaban. As you proceed, you’ll spot two Dementors blocking your way.

According to Mad-Eye, you won’t be able to get past them unless you surrender your wand. He’ll explain why that’s the case.

He will also tell you one interesting fact about Azkaban.

Shortly after, you’ll need to prepare to place your wand on the Wand Weigher. To surrender your wand, you’ll need to earn five stars within three hours. Three stars are needed to pass.

There are bonus progress actions tied to Mad-Eye, your character, the desk, the wand weigher, and one of the Dementors. Focus on those if you want to save some energy.

Thankfully, you won’t have any problems placing your wand on the wand weigher.


You’ll let out a sigh of relief after taking your ticket. Moody will advise you not to lose it since you’ll need it to get your wand before leaving the place. Moments later, the Dementors will move away and allow you to pass.

Feeling slightly uncomfortable about going into Azkaban, you’re thankful that you won’t be alone, as Mad-Eye will be looking after you.
Proceed to Azkaban Cell Block when you are ready to continue. When you arrive, you’ll be able to take a good look at the whole prison. You’ll notice many Dementors flying around.

Mad-Eye will tell you to stay focused. There are two options to reply with. While both options will lead to a similar outcome, it is recommended to pick the first one.

You’ll notice a curious-looking door nearby, so you’ll ask Moody about it. He’ll explain that the most dangerous prisoners are being held there.

You will be surprised to hear that. Moody will tell you that former Death Eaters are locked up there. Following that, he will advise you to focus on the task at hand. Mad-Eye won’t be sure what information Shiratori is willing to share. After all, it’s been a while since he got arrested. He’ll advise you to be careful with your words and will suggest going over the plan before meeting Shiratori.
Reviewing the plan requires earning five stars within three hours. Since all five stars are needed to pass, you should avoid starting this task if you are out of energy.

There are bonus progress actions tied to Mad-Eye and your character. Prioritize those to save as much energy as possible.

After going over the plan, Mad-Eye and you will be on the same page. Hopefully, everything will go according to plan. Once again, Moody will tell you to be careful with what you say to Shiratori.
He will ask if you have any last-minute questions. There are three options to choose from. It is recommended to pick the first or second one. As long as you don’t choose the third option, you can pick the other two first.

Moments later, the two of you will proceed to meet with Shiratori. You’ll need to wait four hours before you can continue. Since you’ll likely be low on energy at this point, it is recommended to wait and let your energy recharge in the meantime.

Head to the interrogation room once the waiting time is over. Shiratori will smile after seeing Mad-Eye and you, and he’ll assume that the Ministry accepted his offer.


You will be curious to know why he wanted to talk to you. Before answering your question, Shiratori will want to know why you decided to meet with him. You’ll tell him that an agent of ‘R’ recently tried breaking into Gringotts. Shiratori will grin at you after hearing that, and he’ll ask if you are sure it was an agent of ‘R’.
Without revealing any details, you’ll calmly say that the thief was looking for something ‘R’ is interested in. Shiratori will ask if it has anything to do with a very old document. Moody will quickly interrupt him and ask that he fulfill his end of the bargain.

Shiratori will smile and nod. Apparently, he knows who the thief is.

After a brief moment of silence, you’ll start getting impatient. However, instead of giving you a direct answer, Shiratori will only say that the thief is indeed an agent of ‘R’. You have two options to react to this. In this situation, it is recommended to stay calm, which is why you should go with the second option.

Shiratori will chuckle and say that you need to be a bit more specific with your question. However, he’ll decide to give you another chance. You’ll quickly assume he wants something in return. As it seems, he already knows that you are a Legilimens.

You’ll wonder what that has to do with your question. By the looks of it, you’ll need to get the answers from Shiratori’s mind. He’ll smile and say that he’s quite good when it comes to Occlumency. Despite Mad-Eye’s suggestion not to play Shiratori’s game, unfortunately, you won’t really have any other option.
Trace the path on the screen to use the power of Legilimency.

Reading Shiratori’s mind requires earning five stars within eight hours. All five stars are needed to pass.

There are two bonus progress actions tied to your character. Prioritize them to save some energy.

After digging through Shiratori’s mind, you’ll find the Dark Wizard you were looking for. The following line will differ based on whether or not you’ve visited Romanian Dragon Sanctuary before.

The Dark Wizard will turn out to be none other than Healer Burke. Suddenly, everything will turn dark.

Shiratori will approach and say that he wants to have a word with you in private. He’ll tell you that ‘R’’s offer still stands.

However, they won’t be willing to wait too long for your answer. As it seems, ‘R’ is confident you will make the right decision. Shiratori’s words will confuse you slightly. He’ll say that you don’t have much time before they make a decision for you. Moments later, you’ll snap out of it and notice Shiratori lying unconscious in his cage.

You won’t really know what happened. According to Moody, it was likely one of Shiratori’s tricks. He will ask if you are feeling all right. There are three options to reply with. This choice won’t have any big impact on the story, so feel free to go with the option you prefer.

You’ll then tell Mad Eye that ‘R’ still wants you to be their leader. You’ll also say that you need to give them a response soon. Otherwise, they’ll force your hand. Needless to say, time is definitely not on your side. You’ll tell Moody you learned the identity of the Dark Wizard who tried to break into Gringotts.

Moody will be glad to hear that, and you’ll also say you know where Burke is. The following lines will differ based on whether or not you have visited the Romanian Dragon Sanctuary before.

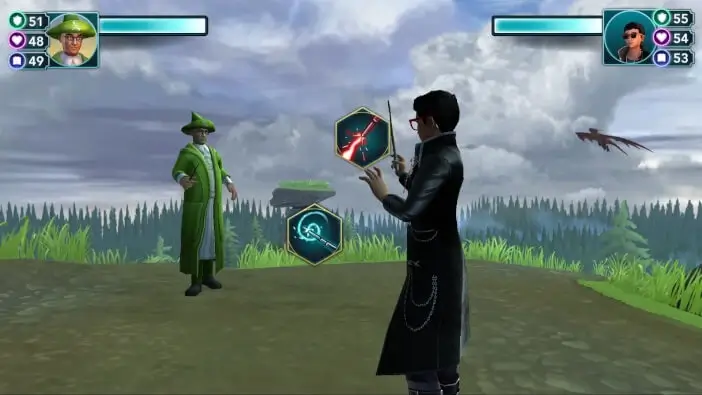
You’ll assume that Burke is after a Chinese Fireball claw, and Mad-Eye will be determined to stop him. Since the following task doesn’t involve spending any energy, you should proceed to the Romanian Dragon Sanctuary as soon as possible.

When you arrive, you’ll spot Burke standing near a Chinese Fireball. Mad-Eye will tell him to surrender.

You’ll calmly ask him to step away from the dragon. Suddenly, he’ll turn around and attack you with the Exploding Charm.

Luckily, both you and Mad-Eye will react fast enough to dodge the spell.

You’ll notice that Moody has Burke’s attention, so you’ll use the opportunity to take care of the dragon.

The creature will take a look at you before flying away.


Mad-Eye will give Burke one last chance to surrender, but the Dark Wizard won’t be willing to do that. Determined to prevent him from harming the dragon, you’ll be ready to take action. However, Burke suddenly hits Moody with the Knockback Jinx.

He will point his wand at the Auror and prepare to attack again. You’ll quickly take out your wand and cast the Banishing Charm.

It will work, and your spell will knock Burke off his feet.

He’ll decide to deal with you. The task window will display the recommended attribute levels as well as the cost of the duel.

This duel is fairly similar to the one you had before at St. Mungo’s. If either your Courage or Empathy is at least three levels higher than the recommended value, you should go Sneaky (in case of Courage) or Aggressive (in case of Empathy) and use Flipendo or Depulso. This way, you should be able to win the duel in two turns as long as you don’t get stunned.
However, if your attribute levels are close to the recommended ones, you can go Aggressive during the first turn and use Incendio. If you get the burn effect, you can follow it up with either Depulso or Flipendo on the second turn. However, if you don’t get the burn effect, or if you get stunned, you might end up losing the duel.

Lastly, since the Empathy requirement is the lowest, you can simply go Aggressive and use Depulso on every turn. With some luck, you will eventually win the duel that way.

When you win, Mad-Eye will use the opportunity to cast Incarcerous Spell at Burke. This will work, and the Dark Wizard will finally be captured.

Needless to say, he won’t be too happy about it. Mad-Eye will quickly use the Silencing Charm to make him quiet. You’ll ask Moody if he is upset about you interfering, and he will want to know if there’s any reason he shouldn’t be.
There are two options for you to reply with. This choice won’t significantly impact the story, so feel free to go with either option.

He won’t hold it against you, advising you not to be reckless in the future. You’ll smile and say that you will try your best. Moody will then decide to take care of Burke, and you’ll ask if it means you will be going back to Azkaban. As it seems, that won’t be the case. Moody will tell you to head back to Gringotts and finish out your Auror assignment.
You will need to wait three hours before you can continue. Since you will likely be low on energy at this point, it is recommended to wait and let your energy recharge in the meantime.

Proceed to Gringotts once the waiting time is over. Upon arriving, you’ll notice the speech bubbles above some of the characters. Tap on those if you want to see what they have to say. Tonks will be glad to see you.

You’ll be happy to see her and the others, but Merula will wonder why it took you so long. Explaining that you were busy catching the person responsible for the Gringotts break-in, Griphook will assume you have good news. Without hesitation, you’ll quickly decide to tell them what happened.
To complete this task, you will need to earn five stars within eight hours. All five stars are needed to pass.

Be sure to slide the screen left and right to see all the available actions. There are bonus progress actions tied to Griphook and Merula. Prioritize these if you want to save some energy.

Tonks will be surprised to hear that Burke was the thief. You’ll say that Mad-Eye is taking him to Azkaban. According to Bill, you will make a fine Auror one day if you decide to pursue that career. On behalf of Gringotts, Griphook will thank you for your help, and moments later, he and Bill will go to inform the rest of the staff.

Tonks will be incredibly happy about the case being solved, and you’ll be glad that another agent of ‘R’ has been put behind bars. Tonks will say it was all thanks to you, but unfortunately, Merula won’t share her excitement.

You’ll ask her if everything is all right, and Tonks will also notice that something is bothering her. Sadly, Merula won’t tell you what’s troubling her. You’ll ask if she’s still upset about not getting the chance to go to Azkaban, recalling her storming out of the office earlier. Merula clearly won’t feel comfortable talking about it.

Tonks will give her a little push.

Eventually, Merula will admit she is upset about her parents.

She’ll say that she doesn’t want your sympathy. There are three options to reply with. If you like Merula, it is recommended to pick the first or third option.

Tonks will be glad that everything worked out in the end, but Merula will say that it doesn’t mean the two of them are friends. Tonks will smile and sarcastically agree with her.

Moments later, Bill will approach and say that an owl came for you.

As it seems, it was Mad-Eye who sent the owl. You’ll quickly take the message and read it, realizing that you’ll need to return to Azkaban soon.

This will mark the end of Chapter 36 of Year 7. Hit the Collect button to claim your rewards. You will receive 350 Coins and 2000 Experience Points.
Why does Moody want you to return to Azkaban? Does it have something to do with ‘R’? And what will happen when you go back there? Find out in the next chapter of Harry Potter Hogwarts Mystery!
Thank you for reading.
