
Chapter 57 – Not well at all
Introduction
Hello everyone, welcome to our Walkthrough for Chapter Fifty-Seven of Year Seven of Harry Potter Hogwarts Mystery. In the previous chapter, you got support from your friends from the Circle of Khanna.
You’ve discovered from Mad-Eye Moody that ‘R’ is seeking older and more experienced Legilimens, but Aurors don’t know where or when the ‘R’ will attack. Later in the hospital, your brother Jacob pointed out that there are experienced Legilimens in Hogwarts, so the Wizarding School is the potential target for the attack.
Lastly, you found out from Elton that the Anniversary of Dai Ryusaki’s death is soon. You remembered the hint from Merula earlier that she and her aunt are preparing to go to an “anniversary party”. After all the information gathering, you know that ‘R’ will attack Hogwarts on the 22nd of June on Ryusaki’s death Anniversary, probably seeking to capture Professor Snape or Professor Dumbledore.
Summary
Chapter Summary:
- Task 1: Prepare For Battle
- Location: Training Grounds
- Requirements: 3 hours – 3/5 stars
- Choice: Tell your friends whether you can trust Merula or not
- We can trust her (58 Courage): +10 Courage
- We can’t trust her: +5 Knowledge
- Task 2: Go to the Bridge Outskirts
- Unlock: Complete Rysaki’s Fate Assignment to unlock this task
- Waiting Time: 4 hours
- Location: Bridge Outskirts
- Requirements: 8 hours – 5/5 stars
- Choice: Reply to your father
- Yell at him for letting you down: +5 Empathy
- Beg him to reconsider: +5 Knowledge
- Guilt trip him: +5 Courage
- Task 3: Chase After Dad
- Waiting Time: 3 hours
- Location: Bridge Outskirts
- Requirements: Your Courage level +1, Your Empathy level, and Your Knowledge level +2; 450 Coins
- Choice: Choose who you will appeal to
- Appeal to Dad (57 Empathy): +10 Empathy
- Appeal to Verucca: +5 Knowledge
- Appeal to Merula: +5 Courage
- Task 4: Return to the Circle
- Waiting Time: 3 hours
- Location: Bridge Outskirts
- Requirements: 3 hours – 5/5 stars
- Choice: Choose who will explain the wow situation
- Explain the situation: +5 Courage
- Let Merula explain (58 Knowledge): +10 Knowledge
- Ministry Assignment: Ryusaki’s Fate
- Unlock: None
- Learn About Dai:
- Location: History of Magic Classroom
- Requirements: 3 hours – 3 stars
- Research Dai:
- Location: Library
- Requirements: 3 hours – 3 stars
- Send Correspondence:
- Location: Owlery
- Requirements: 1 hour – 2 stars
- Review Reports:
- Location: Department of Magical Law Enforcement
- Requirements: 3 hours – 3 stars
- Go Undercover:
- Location: Knockturn Alley
- Requirements: 1 hour – 2 stars
- Quiz Answers:
- What is Professor Sprout’s first name?- Pomona
- Which magical plant can be used to heal wounds?- Dittany
- What spell can stop a young Bouncing Bulb from bouncing? – Knockback Jinx
- Rewards: 5 Gems
- Learn About Dai:
- Unlock: None
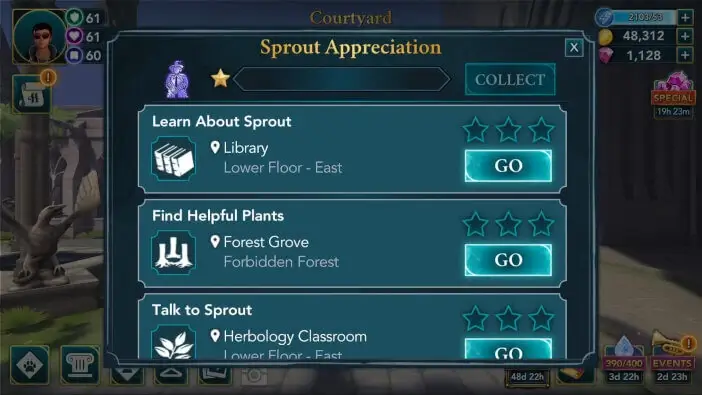
- Ministry Assignment: Sprout Appreciation
- Unlock: None
- Learn About Sprout:
- Location: Library
- Requirements: 3 hours – 3 stars
- Find Helpful Plants:
- Location: Forbidden Forest
- Requirements: 3 hours – 3 stars
- Talk to Sprout:
- Location: Herbology Classroom
- Requirements: 3 hours – 3 stars
- Talk to Hagrid:
- Location: Hagrid’s Hut
- Requirements: 1 hour – 2 stars
- Send a Note to Professor Sprout:
- Location: Owlery
- Requirements: 1 hour – 2 stars
- Quiz Answers:
- What type of potion did Dai Ryusaki create? – Mind Control
- What item did Dai Ryusaki hide? – Dark Scroll
- What is ‘R’ looking for? – A powerful Legilimens
- Rewards: 5 Gems
- Learn About Sprout:
- Unlock: None
- Chapter Rewards: 350 Coins and 2000 Experience Points
Walkthrough
Before continuing the story, you can first finish your assignments. When you are ready, go to the Clocktower Courtyard. Once there, you will meet Olivia. To help you prepare more to face your father, she’ll suggest you learn more about Dai Ryusaki. Whatever happened to him may happen to your Dad as well.

You will agree that if you research Ryusaki’s motives, you could get some insight into your Dad’s thinking, and maybe you will find a way to prevent him from repeating the same fate. Feel free to do your research tasks in any order you like.

It is recommended to select the task duration that matches its star requirements.

Prioritize actions with bonus progress, so you can save some energy.

Try to succeed in mini-tasks to earn extra attribute points.

When you complete all of the tasks, hit the Collect button and go back to the Clocktower Courtyard.

You will report to Olivia what you’ve learned. It seems that Dai Ryusaki had a huge thirst for power, and that led him down a dark and dangerous road. He did realize his mistake eventually, but it was too late.

You will wonder if your father will have the same fate. Olivia will reassure you that there is still a chance for your father because even Ryusaki tried to make amends eventually. You can claim the reward in Hogwarts’s section of the Assignments.

Afterward, you can start with another assignment. Go to the Clocktower Courtyard to meet Professor Flitwick. The Professor really liked how you showed your appreciation for him recently. He’ll say that Professor Sprout certainly deserves appreciation as well.

You will gladly accept to research more about her. This time, you will have another set of tasks to complete. Feel free to do them in any order you like.
As always, it is recommended to select the task duration that matches its star requirements.

Prioritize actions with bonus progress so that you can save a bit of energy.

Mini-tasks can give you some extra attribute points if you complete them successfully.

When you complete all of the tasks, hit the Collect button and report back to Professor Dumbledore at the Clocktower Courtyard.

You will explain what you’ve learned to Professor Flitwick in metaphors, filled with Herbology terms.

Don’t forget to claim the reward for this assignment as well, in the Hogwarts section of the Assignments.

Once you complete all the assignments, you can continue with the main story. When you are ready, go to the Training Grounds to prepare for battle. Once there, you can check what your friends have to say by clicking on the speech bubbles above their heads.
You will inform your friends from the Circle of Khana that the moment you all waited for has arrived. You’ll explain that today is the Anniversary of Ryusaki’s death, which means that ‘R’ is going to attack Hogwarts.

You’ll say that you believe ‘R’ will come to find an adult Legilimens. You will appreciate everyone’s work to prepare for the battle. You’ll decide to take a moment with your friends to reflect on your plans.

To complete this task, you need to earn five stars within three hours. Three stars are required to pass.

Bonus progress actions are tied to Jae, Corey, Ben, and Liz. Prioritize these actions to save some energy. Don’t forget to slide the screen left and right to check the all available options.

You will say that you are here today to stop ‘R’, once and for all.

You will explain that if someone wants to back out now, you’ll understand, because the fight is going to be dangerous, possibly even deadly. Nobody will back out and your friends will stand by your side.


Ben will wonder on which side Merula stands. If you like Merula, it is recommended that you choose the first option to trust her. Apart from that, this choice won’t have a significant impact on the story.

You will give one last motivational speech before the battle.


Shortly after, you’ll decide it’s time to face the enemy at the bridge. Before the battle, you will have a waiting time of four hours. You don’t have to speed up this waiting time because you will be low on energy at this point, and you’ll need to have a full energy bar for the next task.

Once the waiting time is over, go to the Bridge Outskirts to continue the story. If you haven’t completed the “Ryusaki’s Fate” assignment, the next task will still be locked. In that case, go and complete that assignment first. You can check your friend’s thoughts and doubts by tapping the speech bubbles above their heads.
When you arrive, you’ll notice there are no ‘R’ agents at all. You will wonder if you got their plan wrong when suddenly your father and other ‘R’ members start appearing via apparitions in front of the bridge.

He will admit that he is surprised by this gathering, but he’ll demand that you and your friends step aside.

You and your friends will deny him access, and you’ll block the bridge with grim determination.

You will tell your father to give you the amulet. You’ll explain that if he does so, the curse will be lifted, and he’ll for sure realize that what he is doing is a mistake.
Peregrine will refuse once again. There are three ways to reply to him. If you love him, the second option is the best, while the third option is the most emotional one. This choice won’t have an impact on the overall story, so pick the option that suits your character the best.

You’ll almost convince Dad to give up and he’ll say he doesn’t want to hurt you, but suddenly he’ll change his mind. He will give you an ultimatum.


Again, you and your friends will defiantly refuse and you’ll draw your wands for the inevitable battle. Peregrine will accept your challenge.

To defend Hogwarts, you need to earn five stars within eight hours. All five stars are required to complete the task.

Bonus progress actions are tied to Charlie and your character. Prioritize these actions to save a bit of energy. Slide the screen left and right because there are plenty of actions and the battleground is large.

The battle will turn in your favor.


Suddenly, your father will cast a blinding light.

Everyone will be stunned and Peregrine will take this opportunity to cross the bridge.

Ben will tell you that you should go after your Dad while he leads the Circle of Khanna in battle.

Proceed to the bridge to continue the story.

Once there, you will see that Verucca and Merula intercepted Peregrine on the bridge.

Verucca will state her intentions. She wants to kill your father. You can try to de-escalate the situation by appealing to one of the characters, but whatever you try, it will not work.

The conflict between Verucca and your father will escalate again, and Peregrine will demand that Verucca get out of the way. She will respond that she doesn’t take orders from him anymore because he risks their entire mission. She’ll tell him that she is going to lead ‘R’ now.


Both of them will draw their wands, but unfortunately, Verucca will be faster. She’ll cast Expelliarmus and she’ll disarm Peregrine.

You will step forward to defend your Dad. He will be worried that you may be hurt, but you will remind him that you said you are going to save him. You will challenge Verucca, and she’ll be eager to accept the duel.


The task window will display the recommended attribute levels as well as the cost of the duel. Hit Start once you’re ready to begin.

Because Verucca will have similar attribute levels as you, this fight won’t be too difficult. You should try your first attack with Incendio to apply damage over time, and afterward, use high-damage spells like Flipendo or Depulso. You will be faster at dealing with damage than her. The only real danger is if she stuns you, and she’ll try to do that occasionally, but with just a little luck, you should be able to win the duel.

You will cast one final spell.

Verucca will lose the duel.

She will notice that Merula is hesitant to enter the fight, and she will scold her and remind her of the Unbreakable Vow.


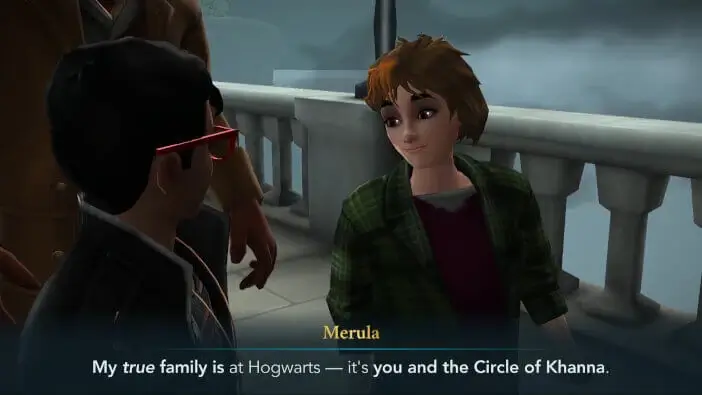
Merula will instead go to you and your father. You will be surprised that nothing happened to her, despite the fact that she probably broke the Vow. Merula will explain that Vow works only for true family, and her true family is you and the Circle of Khanna.
While nobody is watching, Verucca will get her wand back with Accio and she’ll cast a mighty fire spell on all of you.

Your dad will push you and Merula to the side to save you, but the fire will separate him from you, and he will be trapped.


He will have no other way than to jump from the bridge, which is certainly very deadly because of the height.


He will look at you one more time and he will hesitate, probably feeling that he loves you, but suddenly a fire whip will hit him and he will fall from the bridge.


While you are in shock, Merula will explain that both of you need to run away which you’ll do. Before you start the next task, you will have a waiting time of three hours. You will be able to see Verucca standing on the bridge while the Auror from the Ministry approaches to arrest her.

Once the waiting time is over, go to the Bridge Outskirts to continue. Once there, you will notice the Aurors arrive and that ‘R’ members are captured. Check what both sides have to say by tapping on the speech bubbles.
Ben will greet you, and he will notice Merula. You will explain that she defied her aunt. Ben will be puzzled about how Merula is alive because she probably broke her vow. You can explain what happened or let Merula explain it instead. This choice won’t have a significant impact on the story, so feel free to choose the option you like. The first option will lead to Merula’s funny reaction.

Ben will appreciate Merula’s final decision.

You will ask Ben when the Aurors arrived and where the rest of the Circle of Khanna are. He will explain everything to you, and he will be curious to know what happened at the bridge. To complete the next task, you need to earn five stars within three hours. All five stars are required to complete the task.

Bonus progress actions are tied to Ben and Mad-Eye Moody. Prioritize these actions to save some energy. Don’t forget to slide the screen left and right to check all the available actions.

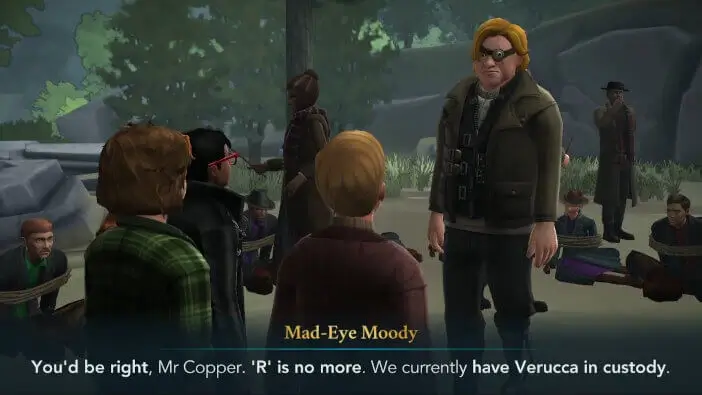
You will hear from Ben that everything went well in the fight and none of the Circle members were seriously injured. He’ll be sorry for your father, and he will give you at least some solace in the fact that the ‘R’ is destroyed. Mad-Eye Moody will come to you and confirm Ben’s statement.
He will shift his attention to you, and he’ll comment that what you did was both incredibly brave and remarkably stupid.

You will say you had to save your father. You will ask him if they’ve found your dad. Mad-Eye will say that he is going to send the team to check, but he’ll doubt that your father is alive.


He’ll let you know if your father’s body is recovered and when they have secured the amulet.

Moody will mention that he is going to visit Jacob at the Hospital to update him on everything. He’ll also mention that Professor Dumbledore has returned to Hogwarts and wants to speak with you.

Shortly after, he will leave your group. You will take a look at the captured ‘R’ members.

You will conclude that the ‘R’ is gone. Ben will be happy that the Circle of Khanna’s mission is completed and Rowan is avenged.


This will conclude this chapter. Hit the collect button to claim your rewards. You will receive 350 Coins and 2000 Experience Points.
A historic day happened at Hogwarts, but what about your father? Will Aurors find him? Is he alive? And about what Dumbledore wants to talk with you? Find out in the next chapter of Harry Potter Hogwarts Mystery.
Thank you for reading.
